Wouldn’t it be great if you could just bulk upload all of your social media posts for the month to HubSpot all at once? Now you can, thanks to HubSpot’s social media scheduling tools.
As of June 20, 2018, if you have a HubSpot Marketing Basic, Professional, or Enterprise account and have it set up to publish to your social media accounts, you can use HubSpot to bulk upload posts to Twitter, Facebook, LinkedIn, and Google+.
It’s a huge timesaver for those of us who spend a lot of time using HubSpot for our inbound marketing efforts, and super easy to do once you have the template set up.
Here’s how it works:
Six steps to bulk scheduling
Once you’ve signed in to your HubSpot account:
1. Navigate to Marketing > Social. The Publishing tab will be selected by default.
2. Click the Schedule in bulk button at the upper right of the dashboard.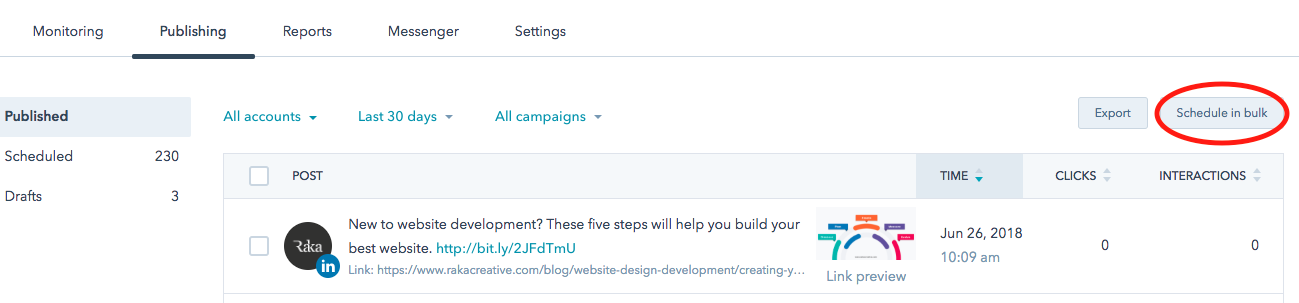
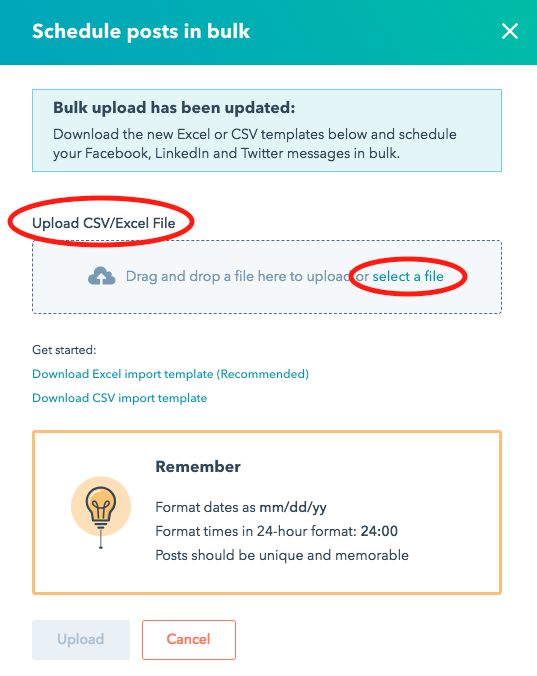
You’ll be welcomed with the screen below.
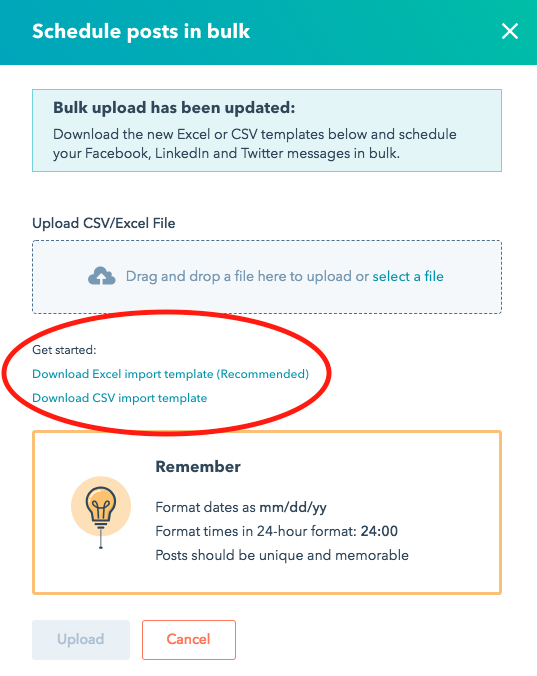
Under “Get started,” choose Download the Excel import template (Recommended) or alternatively Download the CSV import template to download a generic template. We recommend downloading the Excel template since it’s prepopulated with many of the fields you’ll need to complete your bulk social media upload. Be sure to follow your company’s style guide for every post you upload!

3. There are five main columns in the Excel import template as seen below. There is also a column for Character Count, but that is just so you can make sure you don’t go over the character limits set by the social media channel (primarily Twitter) when creating your posts.

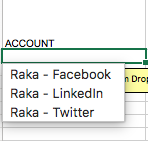
Account: The social account where you want the post published. If you click on the first cell under ACCOUNT you’ll be able to access the drop-down menu to choose which account you want to publish to. You can also manually type the account into the cell.
Date: Dates must be entered in the format “mm/dd/yyyy hh:mm.” For example, “4:39 p.m. on June 26, 2018” would be formatted as “06/26/2018 16:39.” When you first download the template, there will be a week of dates and times populating this column based on the settings you have in HubSpot for when you would like posts to be published. We’ve found we have to finesse the dates and times a little depending on the social channel and whether we’re publishing a full month of posts for all three channels.

Message: The actual content of your social media post. This field is required.
Link: The URL you are sharing in your post. All links will be shortened automatically. This field is optional, as you can also include your link in the message column (as part of your post), or publish a post with no link at all.
Campaign: The campaign you’ve set up in HubSpot to associate with your post. In the Excel template, there is actually a drop-down menu of existing campaigns you can choose from.
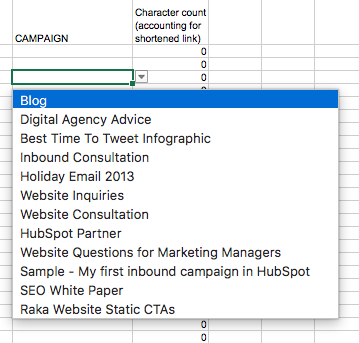
If you add the campaign manually, make sure to match the spelling and capitalization exactly to the information in HubSpot to make sure it gets pulled in correctly. This field is optional. These five columns can be in any order in the file you upload, but they must be present on the first page of your spreadsheet. Any information included on other pages or in other columns will be ignored.
4: When you’re done adding your social posts, save your template file as an XLS or XLSX file. Please note: You can only upload 200 posts per bulk upload at a time. And images must be added manually after the bulk upload.
5: When you’re ready to upload your bulk scheduling import file, either drag it to the Upload CSV/Excel File dialog box or choose select a file to upload it from your computer.
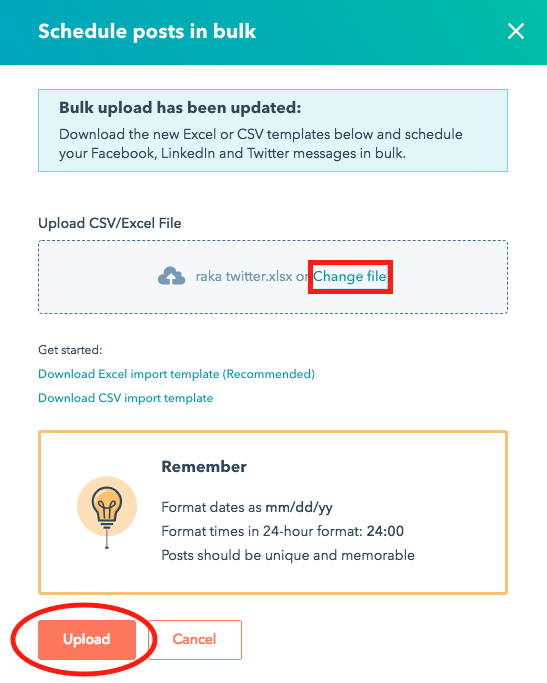
6: You will see an error message if anything is amiss, and you can Change file if you inadvertently uploaded this week’s company fantasy football standings. But if all looks good, you can just choose Upload.
The next screen you see will look something like this: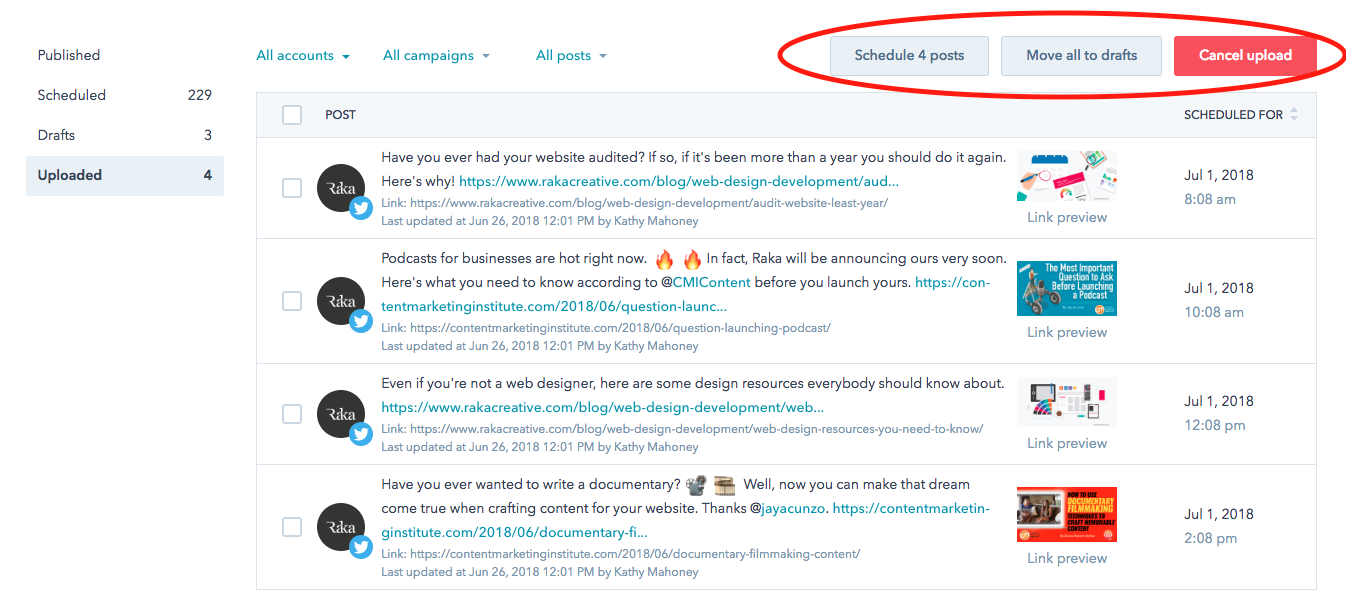
You can see you have the option to Cancel upload, Move all to drafts, or Schedule posts depending on how everything looks on the preview screen and if you need the posts to be proofed by your colleagues/clients before they are scheduled.
Additional notes
We focused on the Excel template in this post since it seems to work more seamlessly, but the process is similar for the CSV format. HubSpot doesn’t allow you to upload Google Sheets at this time, but since Raka uses Google Sheets to be able to share information, we figured out a work-around.
Basically, you set up a similar template in Google Sheets and when complete, just copy and paste the information into an Excel spreadsheet. We experienced errors when trying to actually save the Google Sheet in Excel format or as a CSV, but feel free to play around to see if you get a different result.
All we know is, this process saved us many, many hours, which we can now use to write more awesome posts like this. If you need help with coming up with effective social media posts and content to feed your social calendar, be sure to reach out to your friends at Platinum HubSpot partner agency Raka!